FreeTrack Forum
FreeTrack Forum > FreeTrack : English Forum > Support : Tracking System > My attempt and its small problems
| zaelu | #1 29/09/2007 - 11h32 |
|
Class : Apprenti Off line |
Hello to all and thanks for this useful software to developers.
I have browsed through the forums here and saw this approach to the freetrack 4point "hat": http://freetrack.online.fr/forum/index.php?showtopic=172 and I though that I should do something similar. I used a "comatex" small plastic sheet (3mm thick), cut it with a cutter to the desired shape and stick into the holes 4 modified heads from old analog audio cables (the ones that used to link a CD-ROM to the Audio card in Win98). Alternatively it can be used some wires from old PC cases the ones that link the front Power and HDD LEDs and the switches. I used those for easy removal/replacement of burned or improper (while testing) LEDs. I also have a "connector" for the resistor (I use a serial scheme) and one connector for power source. All assembly is welded together with "Superglue" and "Poxipol". The 4 LEDs assembly is then welded to a cheap "modified" (cut) head flashlight this way getting rid of the hat (I have no airconditioneer in my room and I'm getting slowly balder and balder :D). 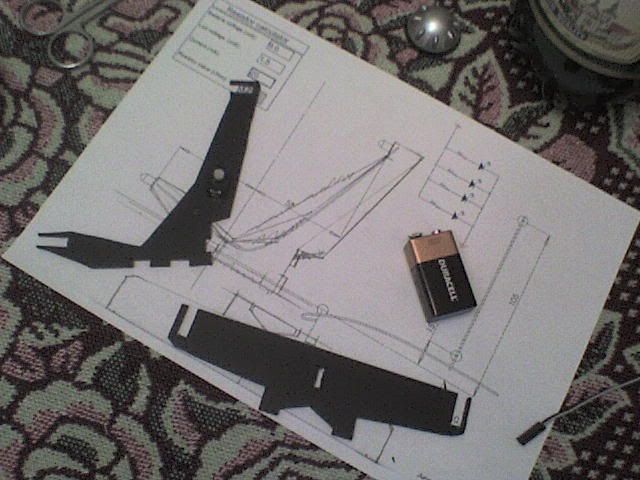 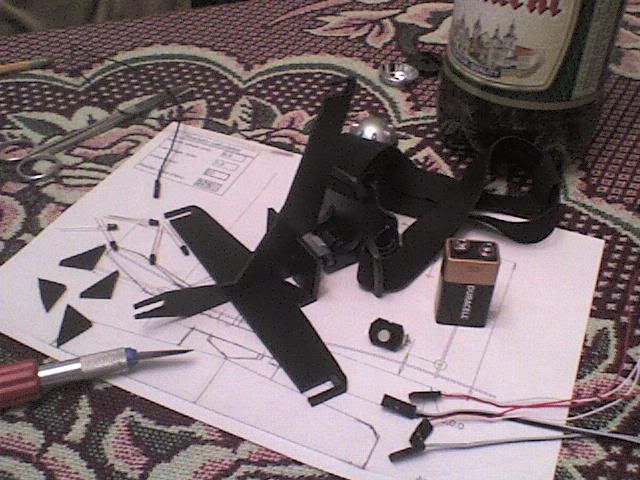 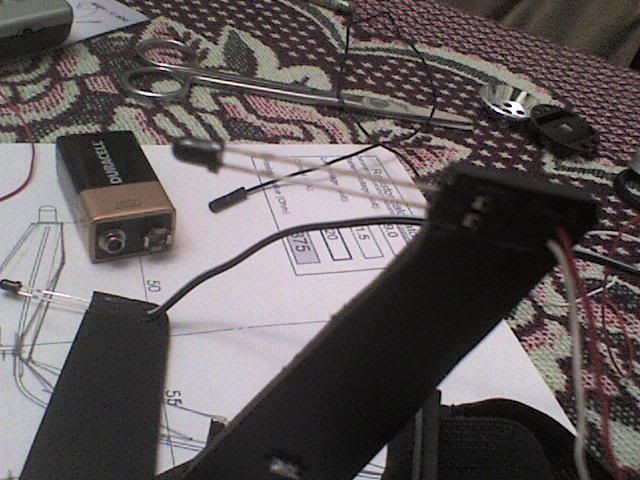 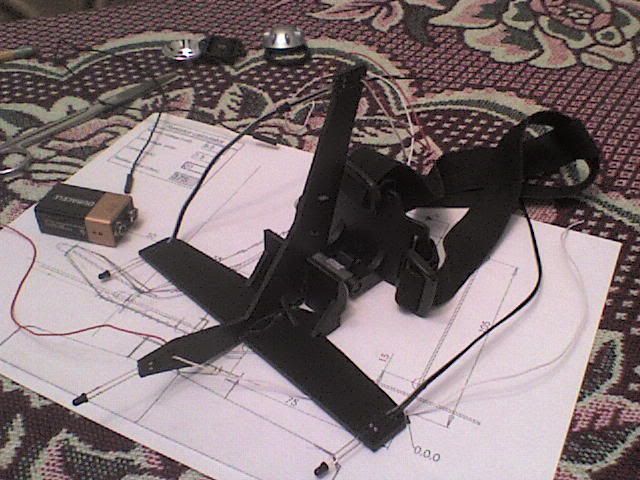 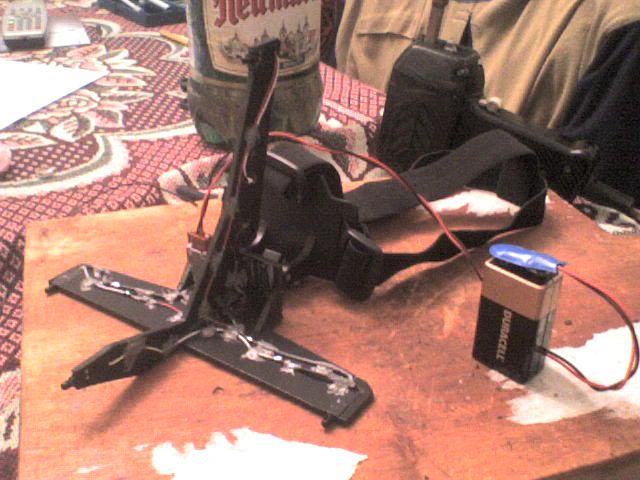 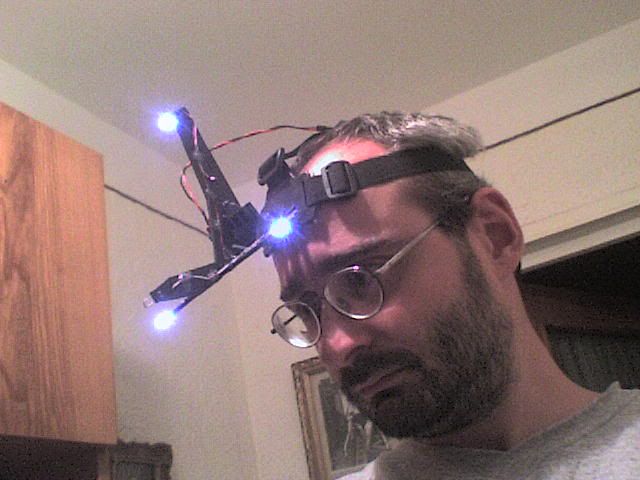 Only 3 LED (normal light) work cause the 4th is a loop wire in that test. Now my problems: 1st. I tried to use a Genius Look 316 webcam that had the following issues: -Freetrack would freeze when I tried to use it with this cam sometimes. Also changing the webcam settings was painfully slow like the whole program was on 3FPS mode and those settings would not be remembered after I pressed once START. -Although I put all the sliders to the Left and all aouto stuff on disable free track would get just 5-7FPS (no IM programs in background). Possible because those minimum settings were not saved at all. 2nd I am trying to use the IR LEDs with the following Code: L53F3BTF01 (or L-53-F3BT-F01 ). I am not good at all at electronics and those from the radioshack I bought them were not capable to tell me the led specs, just the code but, I managed to find out a datasheet on the web: downloadable here which says the LEDs are 1.2V (max 1.5V) front current and 50mA. the online calculator on freetrack webpage says I should use 91Ohms resistor wit a 9V battery. like here:  My question is... Did I interpret that data sheet correctly? Or I am risking blowing the LEDs? edited for some spelling 
Edited by zaelu on 02/10/2007 at 20h05.
|
| Kestrel | #2 29/09/2007 - 12h29 |
|
Off line |
Thanks for contributing details of your build and experiences.

If your webcam settings won't 'stick' change them AFTER you've started a new video stream in Freetrack. This will need to be done every time you start a new video stream, the soon to be released v2.1 has the ability to automate this procedure for you.
You want 1.2V @ 20mA, you've used 50mA which is for max 1.5V case.
Edited by Kestrel on 29/09/2007 at 12h35.
|
| zaelu | #3 29/09/2007 - 13h03 |
|
Class : Apprenti Off line |
Oh... then I need a 220Ohms resistor when I use a 9V battery and a 180Ohms resistor when I use a 8.4V accumulator.
Back to radioshacks street then... Monday  . .Thanx for the clear up. I am looking again through that data sheet and I see more 20mA now . |
| zaelu | #4 02/10/2007 - 19h24 |
|
Class : Apprenti Off line |
OK.
I got my new Webcam Logitech Quickcam Connect (same as Urze), got the resistor(s) 220Ohms Now I have 9V battery (new duracell) Serial assembly 4 IR LEDs L53F3BTF01 1.2V and 20mA 220Ohms resiistor in front of the + of the LEDs one piece of color film as IR filter (dark, unexposed) Logitech QC Connect camera with all auto settings disabled and all sliders to minimum (left) First live picture 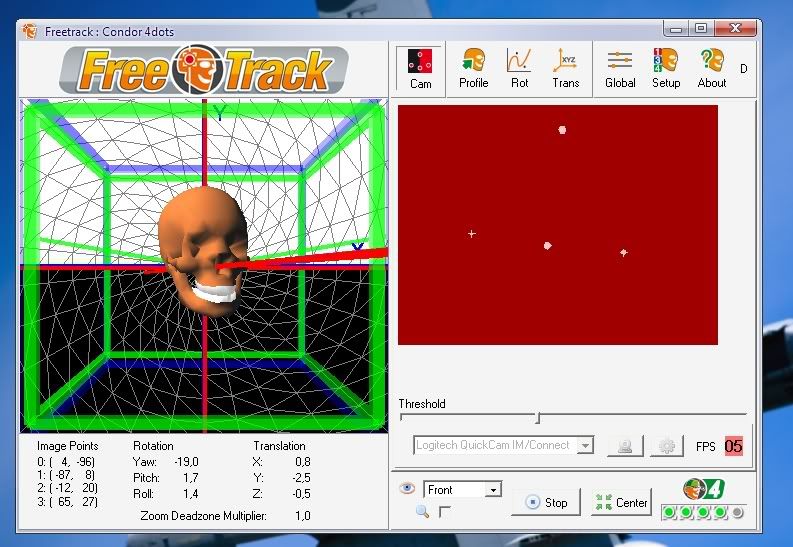 Not too much but is a start. Where do I need to go to improve my FOV... the LEDS are lost to quickly. Should I sandpaper the leds?, search for a IR filter in my webcam, give more power to the LEDs? The FPS are realy low... in AmCap they look normal (arround 30) although I loose sight of the LEDs pretty quick also. I will start by applying Urze settings first.
Edited by zaelu on 02/10/2007 at 19h53.
|
| tristan68 | #5 02/10/2007 - 19h47 |
|
Off line |
Hello zaelu.
About your leds : how do they look like ? Do they have a round top ? If the top is round , there are chances these are narrow beam leds. The trick is then (as you said) to sand them slightly to widen the beam, or sand them flat to get a very wide beam, at the expense of beam intensity. I did this with my 1st setup and it worked fine , take a look Here About your webcam : I have no clues at this time. I also have a quickcam , and it works fine. Could you provide your cam settings ? thx Cya. |
| zaelu | #6 02/10/2007 - 19h55 |
|
Class : Apprenti Off line |
Wo hoo
second attempt! 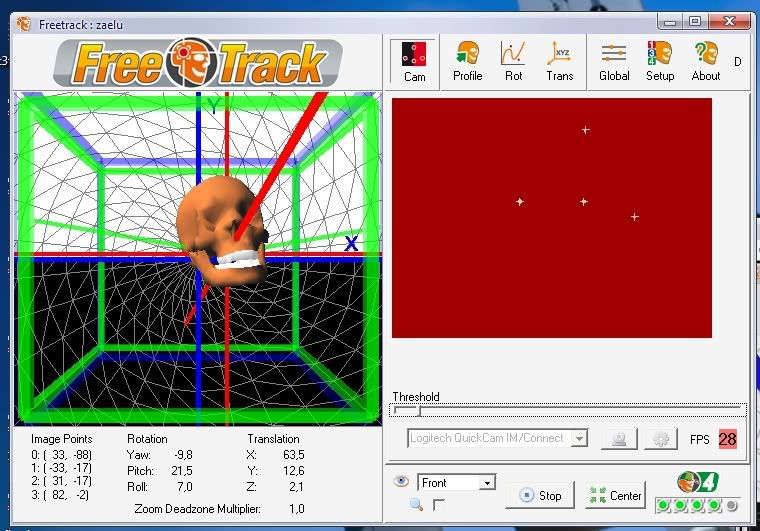 Now the FPS seems to be fixed or in very good progress (tweaking still remain) @tristan... the LEDs are rounded, 5mm diameter and a bit bluish in colour. I will try to sandpaper them... I have 15 pieces :D. Thanx for the help.
Edited by zaelu on 02/10/2007 at 19h56.
|
| urze | #7 02/10/2007 - 20h51 |
|
Class : Apprenti |
Tip/Advise : If you are Tweaking your settings for a certain profile, try to run the simulation in windowed mode so that you can easily change the values in FreeTrack and see the results instantly.
Less frustrating than exiting with the Taskmanager every time, only to realize that you have moved the slider (in FreeTrack) in the wrong direction when you are back again.
Edited by urze on 02/10/2007 at 20h52.
|
| zaelu | #8 04/10/2007 - 03h50 |
|
Class : Apprenti Off line |
I finaly managed to have some results but, I am still a bit far from having it worked out. The LEDs are to dimmed the Free Track is barely tracking them. I sandpappered them and they are now quite "Omni" but they are very weak. I had to put a 180Ohmi resistor and feed them with 1.4v, also I put some exposure in camera settings at close to 5FPS expence to make it work a bit.
I am still wondering if the camera doesn't have an IR filter in it... I might have to take it a part a bit. Here is one of my first attempts in IL-2... the 4th http://stage6.divx.com/user/zaelu/video/1705629/Free-Track,-first-day! |
| tristan68 | #9 04/10/2007 - 11h05 |
|
Off line |
Hello Zaelu
EVERY webcam has a builtin IR filter. You can increase your webcam sensitivity to IR by removing that filter , but your webcam will only be able to be used as IR senser after filter removing. IMO, Your Leds are very dim because their wavelength (940nm) is mostly cut out by the IR filter. The sfh485p, which are usually used for FT don't have such a problem (they're operating at 880nm). Whatever, you always experience a great gain of sensitivity by removing this filter (IR leds appear like flashlights after removing the filter).
Be careful. Leds are not voltage driven, but current driven. You can't just guess the current based on the voltage, because a Led voltage-current characteristic is non-linear. Always use for your calculations : - the standard forward voltage, if you're feeding the led with its nominal current. - the voltage given by the current-voltage chart, if you plan tu try an "exotic" current setting. Your leds are 1.2V 20mA (nominal) model. a 4led serial setting, using a 9v battery and a 180ohm resistor should give you about 23mA in each led,which is slightly over nominal value but is still ok. You should find about 1.2v voltage drop at each led , since you're near the nominal current. cya |
| zaelu | #10 04/10/2007 - 12h55 |
|
Class : Apprenti Off line |
Thank you tristan for the IR tip. I dont give a damn about YM webchat so there would be no problem. I suspect that little red color inide the eye of the camera to be the reflection of the IR filter... it will be eliminated
 . .Also I will return the resistor to 220Ohms value. I'll keep you guys posted. |
| zaelu | #11 04/10/2007 - 15h45 |
|
Class : Apprenti Off line |
OK, I had succesfuly removed the IR filter with tremendeous succes!
 here is a very small video on youtube to see my asolute succes http://www.youtube.com/watch?v=7wM66wmJX4M Also here are some small pictures of the webcam in pieces to see the details in case someone else want to do the same. The only truly delicate thing about it is to spot in time (before you destroy the camera) the small rubber cam on one side of the camera that is hiding a small sunked screw that once removed tha camera come apart in two shells effortless. Also the camera orb can be poped out of its support with a firm but kind of gentle pull. The IR filter is mounted on a small black plastic cover attached on to the CCD card by two other screws. Unscrew the 2... screws and after removing that plastic cover do what you have to do to take it out. I broke it with a screwdriver in gazillion pieces and cleaned up the place. Then put back carefully all the bits back (remember the position of the support lock, the position of the rubber cable suport, the lens assembly etc) 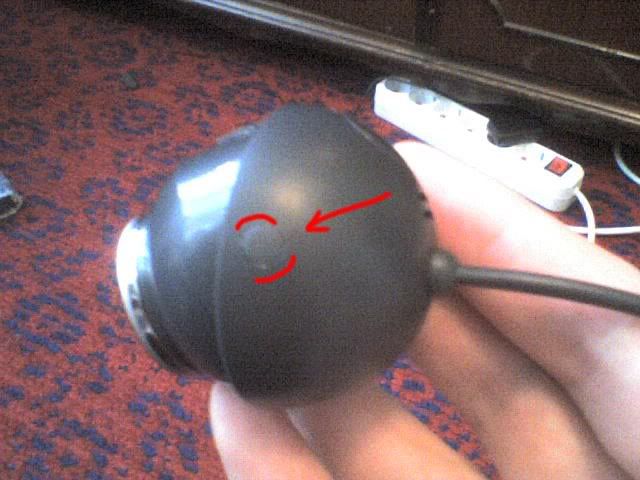 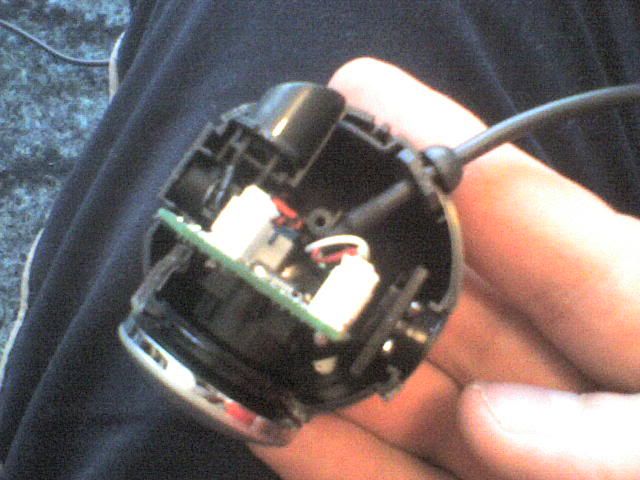 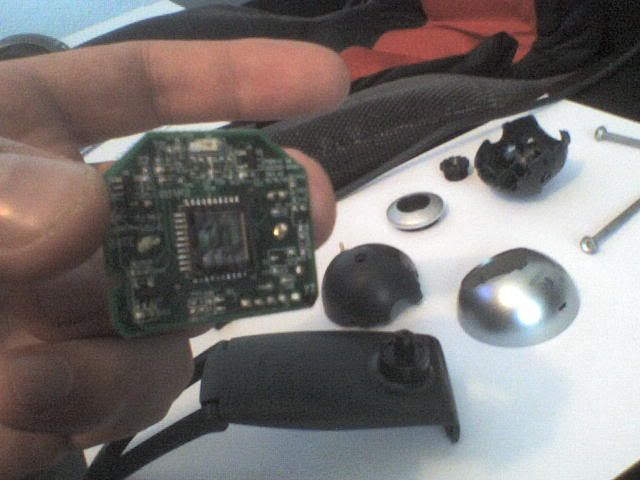 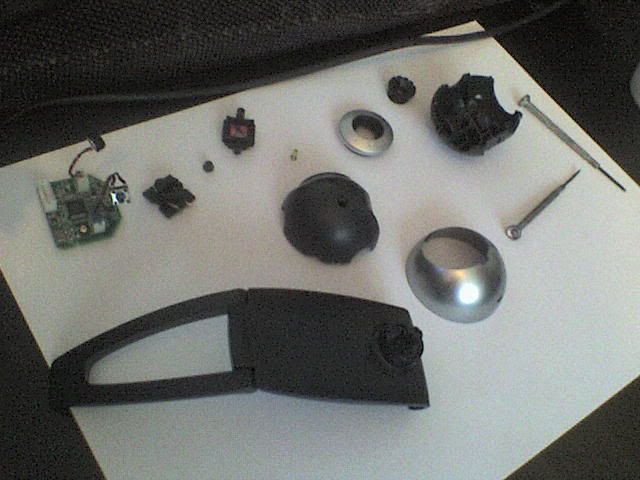 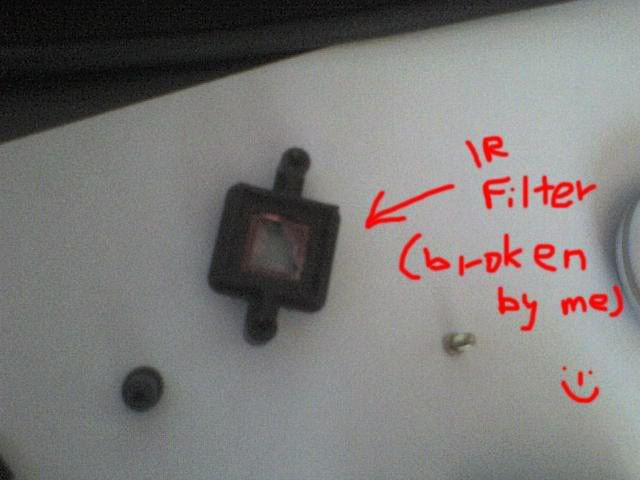 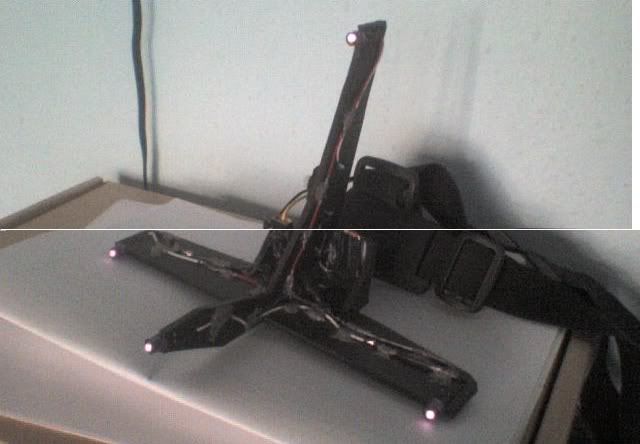 |
| zaelu | #12 08/10/2007 - 14h04 |
|
Class : Apprenti Off line |
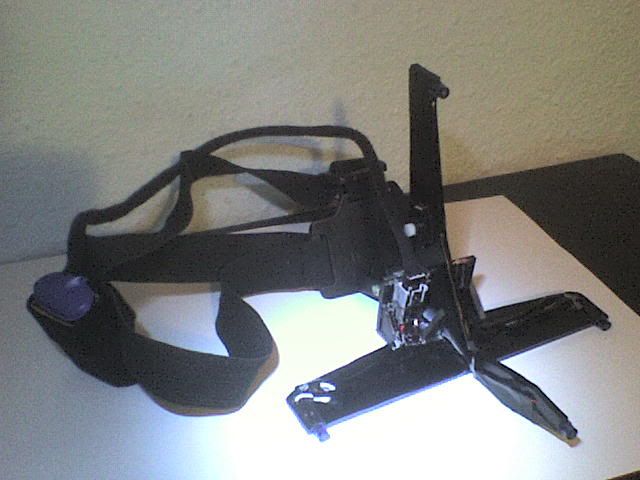
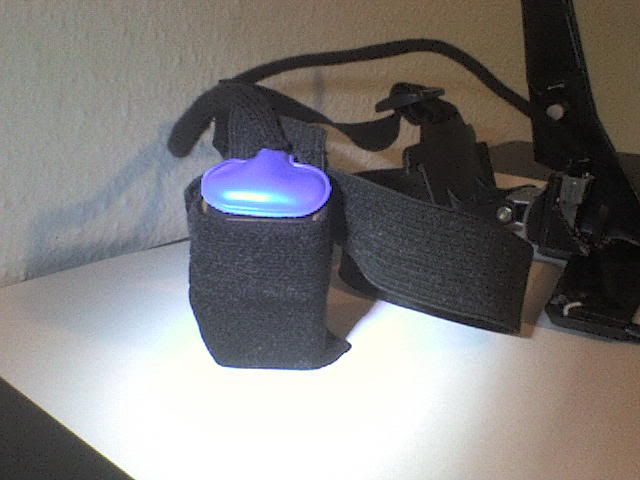
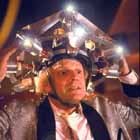
OK, the LEDs setup is properly done. The LEDs connecting wires are covered by black autocolant for protection and the battery sits now in a sack fitted at the back of the head, the power wire runs down through a black shoe lace. Now looks commercial
  If I will have acces to a better camera I will post some higher quality pictures. And here is my first offline dogfight using Free Track 2.0... I rule!  http://stage6.divx.com/user/zaelu/video/1718415/Free-Track,-first-Dogfight p.s. that small stall was on purpose  . .
Edited by zaelu on 08/10/2007 at 14h05.
|


FreeTrack Forum > FreeTrack : English Forum > Support : Tracking System > My attempt and its small problems
> Stats
1 user(s) connected during the last 10 minutes (0 member(s) and 1 guest(s)).
Powered by Connectix Boards 0.8.4 © 2005-2024 (8 queries, 0.015 sec)